
Tuesday's Change: Popcorn Ceiling Removal Before and After

Transformation Tuesday—the it's day we offer a new before-and-after image, typically of a home renovation project, to demonstrate the impact that even little improvements can have. This week, we're highlighting a common home repair project, popcorn ceiling removal before and after, to demonstrate how much a weekend's worth of labor can transform the appearance of a space.
Due to its cost and convenience, the texture of popcorn ceilings has been utilized in buildings for decades. However, many people are unaware that asbestos lurks inside the texture of popcorn ceilings, posing a threat. Before renovating or removing popcorn ceilings, it is essential to have a competent contractor analyze the ceilings for the presence of asbestos. Asbestos can create major health problems in the future. Taking the required preparations ahead can help secure your and others' safety.
Although they might be appealing, many homeowners prefer a more contemporary appearance and view them as out of date. Learn more about the before and after of popcorn ceiling removal and why it is such a terrific remodeling project by reading on.
What Exactly is a Popcorn Ceiling?
Popcorn ceilings, often known as "cottage cheese ceilings," are textured ceilings made from joint compound and Styrofoam beads. Its textured surface helps to lessen sound reverberation for a calmer indoor atmosphere and is a low-cost solution for ceiling flaws from the 1950s and 1960s. This do-it-yourself home improvement method has withstood the test of time and is still used in many homes today.
The Advantages and Disadvantages of Popcorn Ceilings
Popcorn ceilings give a distinct, visually appealing texture to any area, while also reducing sound vibrations and concealing ceiling flaws. However, it is necessary to be aware of the potential dangers posed by popcorn ceilings installed prior to 1978. The asbestos present in older popcorn ceilings, if not adequately treated, can create severe health problems.
Moreover, popcorn ceilings retain dirt and dust, are difficult to clean or paint over, and can limit the room's aesthetic potential. Before selecting whether to keep an existing popcorn ceiling or completely replace it, it is ultimately the responsibility of each homeowner to examine the advantages and cons thoroughly.
Before and After Popcorn Ceiling Removal
The good news is that popcorn ceiling removal is a pretty simple and economical project that can rapidly improve the appearance and atmosphere of a room. Below are the procedures for removing popcorn ceilings, as well as before-and-after images illustrating the enormous difference this effort will make.
Step 1: Preparation
Before you can begin removing your old popcorn ceiling, there are a number of preparatory tasks that must be completed. This involves safeguarding your flooring and furnishings with plastic sheets, joint-taping any doors and windows, and removing all light fixtures and ceiling fans.
You may rest assured that your renovation project will run well and leave no mess behind if you take these procedures. Updating your ceiling will be simple and stress-free if you make the necessary preparations beforehand. Room preparation is the initial stage in eliminating popcorn ceilings. This includes covering the flooring and furnishings with plastic sheets, taping any doors or windows shut, and removing any light fixtures or ceiling fans.
Step 2: Test for Asbestos
If you are considering removing your popcorn ceiling from a home built prior to 1980, you must take the cautious step of getting it tested first due to the presence of asbestos. As asbestos exposure can cause severe respiratory issues and even death, ensuring that your property is asbestos-free should be your top priority prior to undertaking renovations. Having trouble determining how to test the ceiling?
To protect the safety of everyone who may be in the neighborhood when ceilings are being renovated or removed, it is highly advisable to consult a professional before to beginning the removal procedure. Taking the required preparations now can aid in preventing undesirable and dangerous situations from occurring in the future.
Step 3: Cover the Space
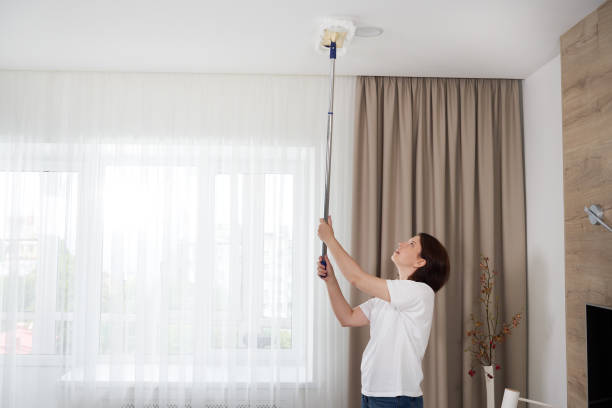
Undoubtedly, adequate preparation is necessary before attempting to clean a textured ceiling. The room must be entirely covered with plastic sheeting, drop cloths, and painter's tape in order to protect it from any potential debris. Moreover, for safety concerns, ceiling fittings must be removed and covered. Before donning necessary safety equipment such as face masks, glasses, and disposable gloves, all of the above should be accomplished. All of these steps will help get any popcorn ceiling project off on the right foot!
Step 4: Remove the Ceiling's Popcorn
Removing popcorn ceiling texture is a multi-step process that demands persistence and diligence. It is essential to use hot water to soften the substance so that it can be easily scraped off. A scraper or putty knife, in addition to a sponge, is all that is required to complete the task successfully. Beginning in one corner, scrape away the popcorn texture with the scraping tool and hot water, and then use the sponge to remove any leftover debris. It's essential to take your time when removing popcorn ceilings, so don't rush through the cleanup!
Step 5: Patch and Repair
It is now time to patch and fix any portions of the ceiling that were damaged during the DIY popcorn removal procedure. This can be accomplished by sealing any holes or gaps using joint compound, followed by sanding the repairs so they are plainly visible. Don't forget to prime the ceiling once you've completed all the necessary repairs; you can then begin painting. If you decide to add crown molding to your DIY popcorn removal job after you've painted, be sure to take measurements and then shop for materials that will meet your needs and complement your freshly updated ceiling.
Step 6: Paint
The final step in removing a popcorn ceiling and completing the aesthetic of a room is to paint the ceiling with flat paint. It will also absorb sound, making it ideal for use in both offices and home rooms. Consider adding light fixtures or ceiling fans to your project to add flair and complete the design. When popcorn ceilings are removed and replaced with flat paint, there are countless aesthetic options.

Pictures of Popcorn Ceiling Texture After Removal
We've compiled a few after images of popcorn ceiling removal to demonstrate the huge difference it can make.
This image depicts the result of removing a popcorn ceiling, with smooth walls and a clean surface. The space is now bright, spacious, and prepared for a new coat of paint.
The ceiling was previously covered with an old, textured substance, but the area is now bare and ready for a makeover. The newly exposed walls reflect the light from the windows, creating a welcoming environment in the room.
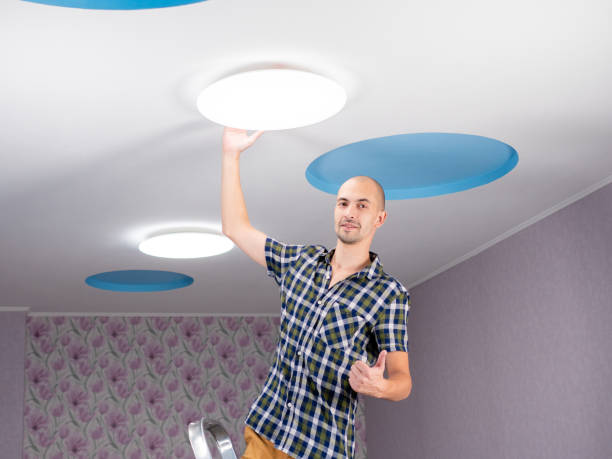
After removing the popcorn ceiling and painting the walls, the room appears welcoming and contemporary. The room has been renovated and is prepared for a new aesthetic.
![]()
Too long had the popcorn ceiling concealed the space's natural charm. Now, new and innovative ideas are welcome, and the possibilities are limitless. With the ceiling removed, the area is now bright and airy, making any makeover a success.
The removal of popcorn ceilings is a simple and cost-effective technique to improve the appearance of a room. The comparison of the before and after images demonstrates how dramatic the difference can be when texture is removed and a space is painted. The nice news is that removing popcorn ceilings is a pretty simple and inexpensive project that anyone can perform. Gather your tools and materials, and prepare to remodel your space!
If you're looking for more ideas about this topic, feel free to check this blog post from Harmony Painting: https://harmonypaintingdenver.com/transformation-tuesday-popcorn-ceiling-removal-before-and-after/